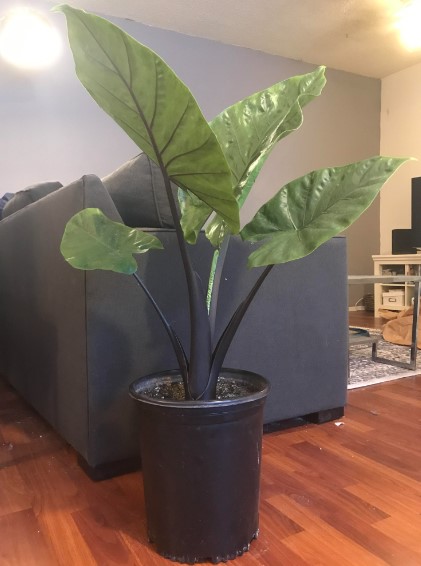
Selecting the right pot size for your Alocasia is a crucial step in ensuring its healthy growth and development. Alocasias, with their dramatic foliage and robust root systems, thrive when given adequate space while maintaining proper soil moisture levels. This guide will help you understand how pot size impacts your Alocasia’s health, how to choose the perfect size, and tips for repotting your plant effectively.
Why Pot Size Matters for Alocasia
1. Root Health
- The size of the pot directly influences the health of your Alocasia’s roots. Too small, and the roots become cramped and stressed; too large, and excess soil can retain water, leading to root rot.
2. Soil Moisture Balance
- A correctly sized pot ensures that the soil dries out evenly, preventing issues like overwatering or underwatering.
3. Stability
- Alocasia plants, especially larger varieties, need a pot size that provides stability to support their top-heavy foliage.
4. Growth Potential
- The right pot size gives your Alocasia enough room to grow and flourish without frequent repotting, which can stress the plant.
Factors to Consider When Choosing a Pot Size
1. Current Root System
- Examine the plant’s roots to determine its current size.
- If the roots are circling the inside of the pot (root-bound), it’s time to size up.
2. Plant Size
- The pot should be proportional to the size of the plant. A pot that’s too small won’t support the plant’s height and weight, while an oversized pot can lead to water retention.
3. Type of Alocasia
- Compact varieties like Alocasia Polly require smaller pots, whereas larger species like Alocasia Macrorrhiza need more room to grow.
4. Growth Stage
- Younger plants require smaller pots, while mature Alocasias may need larger containers to accommodate their expansive root systems.
How to Choose the Right Pot Size
1. Size Up Gradually
- When repotting, choose a pot that’s 1-2 inches larger in diameter than the current one.
- For example: If your Alocasia is in a 6-inch pot, move up to an 8-inch pot.
2. Depth and Drainage
- Opt for a pot that’s deep enough to support the root system but not excessively large.
- Ensure the pot has drainage holes to prevent waterlogging.
3. Material Matters
- Terracotta Pots: Ideal for Alocasias as they absorb excess moisture and allow the soil to dry evenly.
- Plastic Pots: Retain more moisture, which can be suitable for dry environments but requires careful watering.
- Ceramic Pots: Attractive but ensure they have drainage holes for proper water management.
Signs Your Alocasia Needs a Bigger Pot
1. Roots Emerging from Drainage Holes
- Indicates the plant is root-bound and needs more space.
2. Slow Growth or Stunted Leaves
- Lack of room for root expansion can hinder the plant’s overall growth.
3. Frequent Drying of Soil
- If the soil dries out too quickly after watering, the roots may be overcrowded.
4. Top-Heavy Plant
- If the plant becomes unstable and tips over easily, it’s a sign that the pot is too small to support its size.
Tips for Repotting Your Alocasia
1. Timing
- Repot during the growing season (spring or early summer) when the plant is actively producing new growth.
- Avoid repotting during dormancy, as this can stress the plant.
2. Prepare the New Pot
- Choose a pot 1-2 inches larger in diameter than the current one.
- Fill the bottom with a layer of fresh, well-draining soil mix.
3. Gently Remove the Plant
- Carefully remove the Alocasia from its current pot, supporting the base to avoid damaging the roots.
- Loosen any compacted roots and trim away any that are damaged or rotting.
4. Position and Fill
- Place the plant in the center of the new pot, ensuring the top of the root ball sits about an inch below the rim.
- Fill around the root ball with fresh soil, gently pressing it down to eliminate air pockets.
5. Water Thoroughly
- Water the plant well after repotting to help the soil settle. Allow excess water to drain completely.
Common Mistakes to Avoid
1. Using an Oversized Pot
- Large pots retain too much water, increasing the risk of root rot. Always size up gradually.
2. Ignoring Drainage
- A pot without drainage holes traps water, leading to soggy soil and unhealthy roots.
3. Overwatering After Repotting
- Alocasias are sensitive to overwatering, especially after repotting. Allow the soil to dry slightly before the next watering.
4. Repotting Too Often
- Repot only when necessary (every 1-2 years) to avoid unnecessary stress on the plant.
FAQs About Pot Size for Alocasia
Q: How do I know when my Alocasia needs repotting?
- Look for roots growing out of drainage holes, slow growth, or soil that dries too quickly after watering.
Q: Can I plant my Alocasia in a decorative pot without drainage?
- It’s not recommended, but if you do, use it as a cachepot and place the Alocasia in a plastic pot with drainage inside the decorative pot.
Q: How often should I repot my Alocasia?
- Typically every 1-2 years or when the plant outgrows its pot.
Q: Can I use a self-watering pot for Alocasia?
- Self-watering pots can work but require careful monitoring to avoid overwatering.
Conclusion
Choosing the right pot size is essential for the health and growth of your Alocasia. By selecting a pot that supports the plant’s root system, provides stability, and ensures proper drainage, you’ll create an ideal environment for your Alocasia to thrive. Pair this with consistent care, and your Alocasia will reward you with its stunning, vibrant foliage.
Take the time to find the perfect pot, and enjoy the beauty of a well-cared-for Alocasia in your home or garden!
