What Kind of Light Does Alocasia Need? A Guide for Growers


Alocasia plants are prized for their stunning foliage and tropical charm, but meeting their lighting needs is key to keeping them healthy and thriving. Whether you’re a seasoned plant owner or a new gardener, understanding the type of light Alocasias require can make all the difference. This guide explores the lighting needs of Alocasia plants, tips for providing optimal conditions, and how to troubleshoot common lighting issues.


Understanding Alocasia’s Native Habitat

Alocasia plants originate from tropical rainforests in Asia, where they grow under the canopy of taller trees. This environment provides them with filtered, indirect sunlight, mimicking dappled light through the forest. Replicating these conditions indoors or in your garden is crucial for their health and growth.


What Kind of Light Does Alocasia Need?

1. Bright, Indirect Light

  • Optimal Condition: Alocasia plants thrive in bright, indirect sunlight. This mimics their natural rainforest habitat, where light is filtered through tree canopies.
  • What It Means: Place your plant in a well-lit room but away from direct sunlight that could scorch its leaves.

2. Partial Shade

  • Alocasias can tolerate partial shade, especially outdoors, but they perform best when they receive consistent, bright light for at least 6-8 hours a day.

3. Avoid Direct Sunlight

  • Direct sunlight can scorch the delicate leaves, causing brown spots and edges.
  • If outdoors, provide a shaded location or use a sheer curtain indoors to diffuse the light.

4. Low Light? Not Ideal

  • Alocasia plants do not do well in low-light conditions. Insufficient light can lead to slow growth, leggy stems, or pale, droopy leaves.

Best Locations for Alocasia Plants

Indoors

  • East-Facing Windows: Morning sunlight is gentle and ideal for Alocasias.
  • South- or West-Facing Windows: Place the plant a few feet away or use a sheer curtain to filter the light.
  • Bright Rooms: Any area with abundant natural light, such as living rooms or sunrooms, is a great spot.

Outdoors

  • Under Shade Trees: Offers dappled light similar to their native environment.
  • Covered Patios or Balconies: These areas provide protection from direct midday sun while still offering bright light.

Using Artificial Light for Alocasias

If your home doesn’t get enough natural light, grow lights can be an excellent alternative.

Types of Grow Lights:

  1. LED Grow Lights: Energy-efficient and customizable to provide the spectrum of light Alocasias need.
  2. Full-Spectrum Lights: Mimic natural sunlight and are ideal for long-term use.
  3. Fluorescent Lights: A good budget-friendly option, but less effective for larger plants.

Placement:

  • Position the grow light 12-18 inches above the plant to avoid overheating the leaves.
  • Provide 12-14 hours of artificial light daily, especially during shorter winter days.

Signs Your Alocasia is Getting the Right Light

Healthy Growth Indicators:

  • Vibrant, Green Leaves: Consistent light keeps the foliage lush and glossy.
  • Frequent New Leaves: A sign of a happy, well-lit plant.
  • Upright Growth: Leaves remain firm and grow toward the light source.

Signs of Improper Lighting

1. Too Much Light

  • Symptoms:
    • Brown, crispy edges or spots on the leaves.
    • Leaves may curl inward as a protective measure.
  • Solution: Move the plant to a location with filtered light or add a curtain to diffuse direct sunlight.

2. Insufficient Light

  • Symptoms:
    • Yellowing leaves or pale foliage.
    • Leggy growth, with stems stretching toward the light source.
    • Slow or no new leaf development.
  • Solution: Relocate the plant to a brighter spot or add a grow light.

Seasonal Adjustments for Alocasia Lighting

Summer

  • Protect from harsh midday sun by relocating to partial shade or using a curtain indoors.
  • Monitor soil moisture closely, as increased light can dry out the soil faster.

Winter

  • Natural light decreases during winter, so place your Alocasia in the brightest spot available.
  • Consider supplementing with grow lights for consistent light exposure.

FAQs About Alocasia Lighting

Q: Can Alocasias grow in low light?

  • Alocasias can survive in low light but will not thrive. Growth slows, and leaves may become pale or droopy.

Q: How do I acclimate my Alocasia to brighter light?

  • Gradually introduce the plant to brighter conditions over a week to prevent leaf scorch.

Q: Can I keep Alocasia under fluorescent office lights?

  • Yes, but ensure the plant receives supplemental lighting for at least 12 hours a day to make up for the low intensity of fluorescent lights.

Q: How do I protect outdoor Alocasias from too much sun?

  • Use shade cloths, plant them under trees, or move them to a location that gets morning sun and afternoon shade.

Tips for Success

  1. Rotate Regularly: Turn your Alocasia every few weeks to ensure even growth and prevent leaning toward the light source.
  2. Observe and Adjust: Monitor your plant for signs of too much or too little light and make adjustments as needed.
  3. Clean Leaves: Dust the leaves periodically to maximize light absorption and photosynthesis.
  4. Be Patient: New gardeners may need to experiment to find the perfect lighting conditions, but the effort is worth it!

Conclusion

Providing the right kind of light is essential for keeping your Alocasia healthy and thriving. These tropical plants flourish in bright, indirect sunlight, mimicking their natural rainforest habitat. Whether you’re working with natural light, grow lights, or a combination of both, understanding and adjusting to your plant’s needs will ensure it rewards you with stunning, vibrant foliage.

Set your Alocasia up for success by mastering its lighting requirements, and watch it become the centerpiece of your indoor or outdoor space!
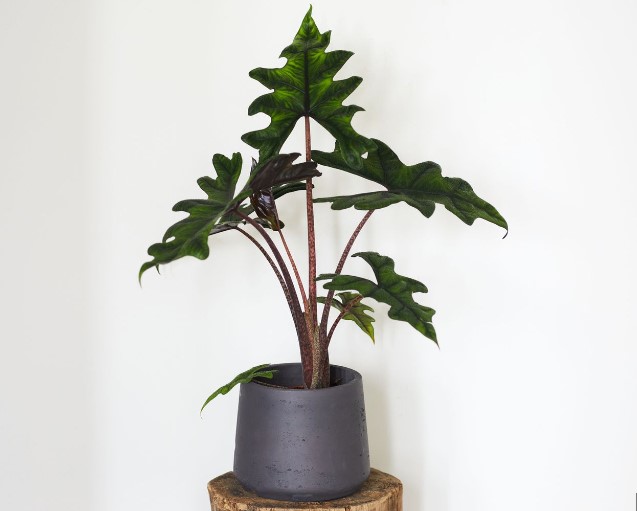
Exploring the Elephant Ear Alocasia: A Tropical Showstopper


The Elephant Ear Alocasia, a bold and dramatic tropical plant, is a true showstopper that transforms any space into a lush, green haven. Known for its large, striking leaves resembling elephant ears, this plant exudes an exotic charm that captivates both indoor gardeners and landscaping enthusiasts. Whether you’re looking to create a tropical vibe indoors or enhance your outdoor garden, the Elephant Ear Alocasia delivers unparalleled visual impact. This guide explores the plant’s unique features, care requirements, and why it’s a must-have for plant lovers.


Why Choose Elephant Ear Alocasia?

1. Stunning Foliage

  • The hallmark of the Elephant Ear Alocasia is its enormous, heart- or arrow-shaped leaves. These glossy, deep green leaves with prominent veins give the plant a sculptural and sophisticated appearance.
  • Some varieties display unique coloration, such as silvery undertones or even variegated patterns, adding to their allure.

2. Tropical Appeal

  • Native to the rainforests of Asia, this plant brings a slice of the tropics into your home or garden. Its bold presence and lush greenery create an instant jungle vibe.

3. Versatile Placement

  • Indoors: Perfect as a statement piece in living rooms, bedrooms, or offices.
  • Outdoors: Works beautifully as a centerpiece in tropical-themed gardens or around water features.

4. Dynamic Growth Habits

  • Elephant Ear Alocasias come in various sizes, ranging from compact varieties suitable for indoor spaces to large cultivars that can reach heights of up to 6-10 feet outdoors.

Popular Varieties of Elephant Ear Alocasia

1. Alocasia Macrorrhiza

  • Features massive, glossy green leaves and is one of the largest varieties, often used for outdoor landscaping.

2. Alocasia Polly

  • A smaller, more compact variety with striking arrow-shaped leaves and white veins, ideal for indoor growing.

3. Alocasia Regal Shield

  • Known for its dark green, almost black leaves with a velvety texture, adding an exotic touch to any space.

4. Alocasia Frydek

  • Displays velvety, deep green leaves with vivid white veins, perfect for those who love a dramatic look in a manageable size.

5. Alocasia Zebrina

  • Distinguished by its zebra-like patterned stems and glossy leaves, offering a unique visual contrast.

Caring for Elephant Ear Alocasia

To keep your Elephant Ear Alocasia thriving, it’s essential to mimic its natural rainforest environment.

1. Light Requirements

  • Optimal: Bright, indirect sunlight.
  • Avoid: Direct sunlight, which can scorch the leaves, and low-light conditions, which may hinder growth.
  • Tip: Rotate the plant periodically to ensure even growth.

2. Watering Needs

  • Keep the soil consistently moist but not soggy. Allow the top 1-2 inches of soil to dry slightly between waterings.
  • Reduce watering during the plant’s dormancy in winter.

3. Humidity

  • Elephant Ear Alocasia thrives in high humidity levels above 50-60%.
  • How to Maintain Humidity:
    • Use a humidifier.
    • Place a pebble tray with water beneath the plant.
    • Group it with other tropical plants to create a humid microclimate.

4. Temperature Preferences

  • Prefers warm temperatures between 18–30°C (65–85°F).
  • Protect it from cold drafts, air conditioning vents, and sudden temperature fluctuations.

5. Soil and Potting

  • Use a well-draining soil mix rich in organic matter. A combination of peat moss, perlite, and loam works well.
  • Ensure the pot has drainage holes to prevent waterlogging.

6. Fertilization

  • Feed the plant every 4-6 weeks during the growing season (spring and summer) with a balanced liquid fertilizer.
  • Avoid over-fertilizing, as this can lead to salt buildup and root damage.

7. Pruning and Maintenance

  • Remove yellowing or damaged leaves to maintain the plant’s appearance and health.
  • Gently clean the leaves with a damp cloth to remove dust and enhance their glossy sheen.

Common Challenges and Solutions

1. Yellowing Leaves

  • Cause: Overwatering or underwatering.
  • Solution: Adjust your watering schedule to keep the soil evenly moist.

2. Leaf Browning or Crispy Edges

  • Cause: Low humidity or lack of water.
  • Solution: Increase humidity levels and ensure consistent watering.

3. Drooping Leaves

  • Cause: Environmental stress, overwatering, or underwatering.
  • Solution: Evaluate light, water, and humidity conditions, and make adjustments as needed.

4. Pests

  • Common Pests: Spider mites, aphids, and mealybugs.
  • Solution: Treat infestations with neem oil or insecticidal soap and inspect the plant regularly.

Decorating with Elephant Ear Alocasia

1. Indoor Impact

  • Place it in a decorative pot to make it the focal point of a room. Its bold leaves pair beautifully with modern or minimalist interiors.
  • Combine with smaller tropical plants for a layered, lush effect.

2. Outdoor Elegance

  • Use large varieties as landscaping features near pools, patios, or garden borders.
  • Pair with ferns, calatheas, or ornamental grasses for a cohesive tropical theme.

3. Seasonal Versatility

  • If grown outdoors in colder climates, Elephant Ear Alocasia can be overwintered indoors. Simply pot it up and place it in a bright, humid area of your home.

FAQs About Elephant Ear Alocasia

Q: How fast does Elephant Ear Alocasia grow?

  • Under optimal conditions, it can grow rapidly during the growing season, producing new leaves every few weeks.

Q: Can Elephant Ear Alocasia be grown outdoors?

  • Yes, it thrives outdoors in tropical and subtropical climates. In colder areas, it can be grown as an annual or overwintered indoors.

Q: How do I know if my Alocasia needs water?

  • Check the top 1-2 inches of soil. If it feels dry, it’s time to water. Use a moisture meter for more accuracy.

Q: Why are my Alocasia’s leaves drooping?

  • Drooping can result from overwatering, underwatering, or stress from environmental changes.

Conclusion

The Elephant Ear Alocasia is more than just a plant—it’s a statement piece that brings tropical beauty and sophistication to any space. Whether you’re an indoor gardener or a landscaping enthusiast, this versatile plant is sure to impress with its bold foliage and dramatic presence. With proper care and attention, your Elephant Ear Alocasia will thrive, transforming your home or garden into a lush tropical paradise.

Add an Elephant Ear Alocasia to your collection today and experience the magic it brings to your living space!

Avoiding Rhizome Rot in Alocasia: Essential Care Tips


Rhizome rot is a common but preventable issue for Alocasia plants, often resulting from overwatering, poor drainage, or soil-borne pathogens. If left untreated, this problem can cause extensive damage to your plant, including leaf yellowing, stunted growth, and even death. However, with the right care practices and early intervention, you can protect your Alocasia and keep it thriving. This guide provides essential strategies to prevent rhizome rot and maintain the health of your plant.

What is Rhizome Rot?

Rhizome rot occurs when the underground structure of the Alocasia, known as the rhizome, begins to decay. This condition is often caused by:

  1. Excess Moisture: Overwatering or waterlogged soil deprives the rhizome of oxygen, causing it to break down.
  2. Pathogens: Fungal and bacterial infections thrive in wet, compacted soil and attack the rhizome.
  3. Poor Drainage: Improper soil and pots without drainage holes trap excess water.

Symptoms of Rhizome Rot

Above-Ground Indicators:

  • Yellowing Leaves: A common sign of water stress.
  • Drooping Foliage: Despite watering, leaves appear limp or lifeless.
  • Stunted Growth: The plant produces fewer or no new leaves.
  • Leaf Drop: Healthy-looking leaves may suddenly fall off.

Below-Ground Indicators:

  • Mushy Rhizome: A healthy rhizome is firm and tan, while a rotting one is soft, dark, and may emit a foul smell.
  • Darkened Roots: Roots appear black or brown instead of white or light tan.

Causes of Rhizome Rot

  1. Overwatering: Frequent watering keeps the soil too wet, preventing oxygen from reaching the rhizome.
  2. Improper Soil Mix: Dense, poorly draining soils trap water and promote rot.
  3. Inadequate Pot Drainage: Pots without drainage holes retain excess water at the bottom.
  4. Humidity Fluctuations: Excessively humid soil conditions combined with low air circulation encourage fungal growth.
  5. Pathogen Infections: Fungi like Pythium and bacteria thrive in damp, compacted soil, attacking weakened rhizomes.

Prevention Strategies for Rhizome Rot

1. Use a Well-Draining Soil Mix

  • Ideal Mix: Combine peat moss, perlite, and orchid bark for a blend that retains moisture while allowing excess water to drain.
  • Avoid Heavy Soils: Do not use garden soil or heavy potting mixes that retain water for too long.

2. Choose the Right Pot

  • Always select pots with drainage holes to allow water to escape.
  • Use terracotta pots to absorb extra moisture and promote better aeration.

3. Water Wisely

  • Water only when the top 1-2 inches of soil are dry.
  • Use a moisture meter to check soil moisture levels at the root zone.
  • Adjust watering frequency based on the season: less water is needed during winter dormancy.

4. Maintain Ideal Humidity

  • Keep air humidity levels above 50%, but avoid letting the soil remain wet.
  • Use a pebble tray or humidifier to increase air moisture without overwatering.

5. Monitor Drainage

  • Check how quickly water drains after watering. If water pools at the surface, it’s time to repot with a better soil mix.

6. Inspect Regularly

  • Periodically lift the pot to check for roots emerging from the drainage holes.
  • Early signs of stress, like yellowing or drooping leaves, can indicate underlying rhizome issues.

How to Treat Rhizome Rot

1. Stop Watering Immediately

  • Let the soil dry out to prevent further damage while you inspect the plant.

2. Remove the Plant from the Pot

  • Carefully take the Alocasia out of its pot to examine the roots and rhizome.

3. Trim Affected Areas

  • Use sterilized scissors or pruning shears to remove any mushy, discolored, or foul-smelling sections.
  • Cut back to healthy, firm tissue.

4. Disinfect the Rhizome

  • Soak the remaining healthy rhizome in a hydrogen peroxide solution (1 part hydrogen peroxide to 4 parts water) for 10 minutes.
  • This step helps kill pathogens and oxygenates the rhizome.

5. Repot in Fresh Soil

  • Use a clean pot with fresh, well-draining soil to avoid reinfection.
  • Avoid watering immediately after repotting to let the rhizome recover.

6. Adjust Care

  • Place the plant in a location with bright, indirect light.
  • Resume watering only when the soil feels dry to the touch.

Best Practices for Long-Term Alocasia Health

  1. Set a Watering Schedule: Water consistently, but ensure the topsoil dries between sessions.
  2. Use the Right Soil Mix: Always pot Alocasia in a mix designed for aroids or tropical plants.
  3. Inspect During Repotting: Examine the rhizome and roots for any signs of decay every 1-2 years when repotting.
  4. Maintain Stable Conditions: Avoid abrupt changes in temperature, humidity, or light, which can stress the plant.
  5. Check for Pests: Some pests, like root-feeding nematodes, can weaken the rhizome and make it more susceptible to rot.

Common Questions About Rhizome Rot

Q: How often should I water my Alocasia?

  • Water when the top 1-2 inches of soil are dry. The frequency depends on the season, pot size, and humidity levels.

Q: Can I save an Alocasia with rhizome rot?

  • Yes, if caught early. Remove the rotted sections, disinfect the rhizome, and repot in fresh soil.

Q: Should I fertilize after treating rhizome rot?

  • Wait at least 4-6 weeks to allow the plant to recover before applying a diluted fertilizer.

Q: What type of soil is best for Alocasia?

  • A well-draining mix with peat moss, perlite, and orchid bark works best. Avoid compact or water-retaining soils.

Conclusion

Rhizome rot can be a challenging issue for Alocasia owners, but with proper care and preventive measures, it’s entirely avoidable. By using a well-draining soil mix, watering wisely, and maintaining optimal humidity, you can create an environment where your Alocasia thrives. Regular monitoring and early intervention are key to addressing potential problems before they escalate.

With the tips in this guide, you’ll be well-equipped to protect your Alocasia from rhizome rot and enjoy its stunning foliage for years to come!

Using an Alocasia Water Meter: How to Ensure Proper Hydration


Alocasia plants, known for their dramatic foliage and tropical allure, can be quite particular when it comes to watering. Overwatering or underwatering can quickly lead to issues like root rot, yellowing leaves, or stunted growth. A water meter is a simple yet effective tool to ensure your Alocasia receives the precise hydration it needs. In this guide, we’ll explain how to use a water meter correctly, the benefits it offers, and how it can help you maintain a healthy, thriving Alocasia.

Why Proper Hydration is Crucial for Alocasia Plants

Alocasias are native to tropical rainforests, where they thrive in consistently moist but well-draining soil. Overwatering or underwatering can disrupt this balance, leading to:

  1. Root Rot: Too much water suffocates roots, causing them to decay.
  2. Leaf Yellowing: A sign of water stress, often due to inconsistent hydration.
  3. Growth Issues: Lack of water or overly dry soil can stunt growth and cause leaves to droop.

A water meter helps prevent these issues by providing an accurate reading of your plant’s soil moisture level.

What is a Water Meter?

A water meter is a handy device that measures the moisture content of the soil. It typically consists of:

  • Probe: Inserted into the soil to detect moisture levels.
  • Display Dial: Shows readings ranging from “dry” to “wet.” Some meters also measure pH and light levels.

Benefits of Using a Water Meter for Alocasia Plants

1. Accuracy

  • A water meter provides a precise measurement of soil moisture, taking the guesswork out of watering.

2. Prevents Overwatering

  • By identifying when the soil is still moist, you can avoid watering too soon, reducing the risk of root rot.

3. Consistency

  • Ensures your Alocasia receives the right amount of water at the right time, promoting even growth.

4. Ideal for Beginners

  • Perfect for new plant owners still learning the nuances of Alocasia care.

5. Saves Time

  • Quick and easy to use, making plant care more efficient.

How to Use a Water Meter for Your Alocasia

Step 1: Choose the Right Meter

  • Look for a water meter specifically designed for indoor plants. Some models also measure light and pH, offering additional insights.

Step 2: Insert the Probe

  • Insert the probe into the soil near the base of your Alocasia, but avoid placing it too close to the plant’s stem to prevent root damage.
  • Ensure the probe goes deep enough to reach the root zone, typically 2-3 inches for smaller plants and 4-6 inches for larger ones.

Step 3: Read the Meter

  • Check the reading on the dial. Most meters categorize soil moisture into three zones:
    • Dry: Time to water.
    • Moist: Ideal for Alocasias. No watering needed yet.
    • Wet: Soil is oversaturated; hold off on watering.

Step 4: Adjust Watering Accordingly

  • Water only when the reading shows the soil is in the dry zone.
  • After watering, check the meter again to ensure the moisture level is sufficient but not excessive.

Step 5: Clean the Probe

  • After each use, wipe the probe clean with a dry cloth to maintain accuracy and prevent soil residue buildup.

When to Use a Water Meter

  • Routine Checks: Use the water meter before each watering session to avoid overwatering.
  • After Repotting: Monitor moisture closely when your plant is adjusting to new soil.
  • Seasonal Changes: Adjust watering frequency during winter dormancy or summer growth spurts.

Understanding Alocasia’s Watering Needs

1. Soil Preferences

  • Alocasias require a well-draining, moisture-retentive soil mix. The ideal mix includes peat moss, perlite, and orchid bark.

2. Watering Frequency

  • Water when the top 1-2 inches of soil feel dry or when the water meter indicates a dry reading.
  • Frequency depends on factors like pot size, soil type, and humidity.

3. Dormancy Period

  • During late fall and winter, Alocasias enter dormancy and require less water. Use the water meter to ensure the soil isn’t staying wet for prolonged periods.

Common Watering Mistakes and How a Water Meter Helps

Mistake Impact on Alocasia How a Water Meter Helps
Overwatering Root rot, yellowing leaves Indicates soil is still moist
Underwatering Drooping or crispy leaves Alerts you when soil is too dry
Inconsistent Watering Stressed plant, uneven growth Encourages consistent watering habits
Relying on Surface Feel Misjudges moisture deeper in the soil Provides accurate root-zone moisture

Tips for Effective Watering with a Water Meter

  1. Test in Multiple Locations: Check the soil moisture in 2-3 spots around the pot to get an accurate reading.
  2. Combine with Visual Cues: Look for drooping or yellowing leaves as additional indicators of watering needs.
  3. Calibrate Regularly: If your water meter has a calibration feature, ensure it’s set correctly for accurate readings.
  4. Don’t Overreact: If the meter reads dry, water gradually to avoid oversaturating the soil all at once.

FAQs About Using a Water Meter for Alocasias

Q: Can I use a water meter for other plants?

Yes, water meters are versatile and can be used for most indoor and outdoor plants.

Q: How often should I check the moisture level?

Check every 2-3 days, or more frequently during warm weather when soil dries out faster.

Q: Do water meters work in all soil types?

Yes, but they work best in well-aerated, loose soil. Heavy clay soils may give less accurate readings.

Q: Can a water meter detect overwatering?

Yes, if the reading consistently shows “wet,” it’s a sign of overwatering or poor drainage.

Conclusion

Using a water meter is an excellent way to ensure proper hydration for your Alocasia plants. By taking the guesswork out of watering, this simple tool helps prevent common issues like root rot and water stress, ensuring your plant remains healthy and vibrant. Combined with other care practices, a water meter can be your go-to device for mastering Alocasia watering techniques.

Invest in a water meter today and enjoy the confidence of knowing your Alocasia is always perfectly hydrated!

Should I Repot My Alocasia? Signs It’s Time to Transplant

Repotting is a crucial aspect of plant care, ensuring healthy root development, adequate growth space, and optimal soil conditions. For Alocasia plants, which are known for their dramatic foliage and fast-growing nature, timely repotting is especially important. But how do you know when it’s time to repot your Alocasia? This guide will help you identify the signs, understand the process, and ensure your plant transitions smoothly to its new pot.

Why Repotting Is Important for Alocasia Plants

Repotting helps maintain your Alocasia’s health and vigor by addressing:

  1. Root Space: Prevents the plant from becoming root-bound, which can restrict growth.
  2. Nutrient Levels: Provides fresh, nutrient-rich soil to support foliage and root development.
  3. Drainage Issues: Replacing old, compacted soil improves aeration and drainage, reducing the risk of root rot.

Signs It’s Time to Repot Your Alocasia

1. Roots Growing Out of Drainage Holes

  • One of the most obvious signs that your Alocasia needs repotting is when roots start protruding from the bottom of the pot.
  • Why: This indicates the plant is root-bound, meaning the roots have outgrown their current container.

2. Soil Dries Out Too Quickly

  • If you notice that the soil dries out almost immediately after watering, it may be because the roots are taking up most of the pot’s space.
  • Why: Overcrowded roots limit the soil’s ability to retain moisture.

3. Stunted Growth

  • A healthy Alocasia typically produces new leaves regularly. If your plant’s growth slows or stops, it may be a sign that it needs more space.
  • Why: Root-bound plants struggle to absorb water and nutrients, leading to stunted growth.

4. Yellowing or Wilting Leaves

  • While yellowing can result from overwatering or pests, it’s also a symptom of a root-bound plant.
  • Why: Constrained roots are unable to support the foliage effectively.

5. Cracked or Distorted Pot

  • If your plant is in a plastic pot and you notice bulging or cracking, it’s a clear sign that the roots are overcrowded.
  • Why: The roots are pushing against the container as they grow.

6. Poor Drainage and Waterlogging

  • If water sits on the surface of the soil for too long or the potting mix feels overly compacted, it’s time to repot.
  • Why: Old, compacted soil loses its ability to drain effectively, increasing the risk of root rot.

When to Repot Alocasia Plants

The best time to repot an Alocasia is during its active growing season—spring or early summer. This is when the plant is most resilient and can quickly adjust to its new environment. Avoid repotting during dormancy (late fall and winter), as the plant’s growth slows and it becomes more vulnerable to stress.

How to Repot Your Alocasia: Step-by-Step Guide

1. Gather Supplies

  • A pot 1-2 inches larger in diameter than the current one (with drainage holes).
  • Fresh, well-draining potting mix (e.g., a mix of peat moss, perlite, and orchid bark).
  • Gloves to protect your hands from potential irritants in the plant’s sap.

2. Water the Plant

  • Water your Alocasia a day before repotting. This softens the soil and reduces transplant shock.

3. Remove the Plant from Its Pot

  • Gently turn the pot on its side and slide the plant out, supporting the base of the stems.
  • If the plant is stuck, tap the sides of the pot or use a knife to loosen the soil.

4. Inspect the Roots

  • Check the roots for signs of rot (brown, mushy roots) or damage and trim them with sterilized scissors.
  • Healthy roots should be white or light tan and firm to the touch.

5. Prepare the New Pot

  • Add a layer of fresh potting mix to the bottom of the new pot.
  • Place the plant in the center, ensuring it sits at the same depth as before.

6. Fill with Fresh Soil

  • Add the potting mix around the root ball, gently pressing it down to eliminate air pockets. Avoid compacting the soil too tightly.

7. Water Thoroughly

  • Water the plant until water drains from the bottom of the pot. This helps settle the soil around the roots.

8. Adjust Placement

  • Place the repotted Alocasia in its usual spot with bright, indirect light. Avoid direct sunlight, which can stress the plant during recovery.

Post-Repotting Care Tips

  1. Watering:
    • After repotting, allow the top inch of soil to dry out before watering again. Avoid overwatering while the plant adjusts.
  2. Humidity:
    • Keep humidity levels above 50% to reduce stress. Mist the plant or use a humidifier to maintain moisture in the air.
  3. Fertilization:
    • Wait at least 4-6 weeks before fertilizing to avoid overloading the plant with nutrients while it recovers.
  4. Monitoring:
    • Watch for signs of stress, such as drooping leaves or yellowing. These are normal immediately after repotting but should improve within a few weeks.

Common Mistakes to Avoid When Repotting

  1. Using an Oversized Pot:
    • A pot that’s too large can lead to waterlogged soil and root rot. Always choose a pot only slightly larger than the current one.
  2. Skipping Root Inspection:
    • Failing to check the roots for rot or damage can lead to ongoing health issues for your plant.
  3. Overwatering After Repotting:
    • While it’s important to water immediately after repotting, overwatering during the recovery period can stress the plant.
  4. Repotting Too Often:
    • Alocasias don’t need frequent repotting. Repot only when necessary to avoid unnecessary stress.

FAQs About Repotting Alocasias

Q: How often should I repot my Alocasia?

  • Every 1-2 years or when the plant shows signs of being root-bound.

Q: Can I repot my Alocasia during winter?

  • It’s best to wait until spring or early summer when the plant is actively growing.

Q: Should I fertilize after repotting?

  • No, wait at least 4-6 weeks to allow the plant to adjust before applying fertilizer.

Q: What type of soil should I use?

  • A well-draining mix with peat moss, perlite, and orchid bark is ideal for Alocasias.

Conclusion

Repotting your Alocasia at the right time and with the proper technique is key to maintaining its health and ensuring vibrant growth. By understanding the signs that your plant needs repotting and following the steps outlined in this guide, you can give your Alocasia the fresh start it needs to thrive.

Keep an eye on your plant’s roots and growth habits, and don’t be afraid to get your hands dirty when it’s time to transplant—your Alocasia will thank you with lush, dramatic foliage!

Caring for Alocasia Micholitziana: Tips for Thriving Growth


The Alocasia Micholitziana, often referred to as the “Green Velvet Alocasia,” is a striking tropical plant known for its dark green, velvety leaves adorned with bright white veins. Its compact size and unique foliage make it a favorite among indoor gardeners looking for a touch of elegance and exotic charm. While its beauty is unmatched, this Alocasia variety requires specific care to ensure it thrives. This guide offers detailed tips for maintaining the health and growth of your Alocasia Micholitziana.

Features of Alocasia Micholitziana

1. Velvety Foliage

The standout feature of this plant is its rich, velvety leaves. The deep green color contrasts beautifully with the prominent, white veins that run throughout each leaf, creating a stunning visual effect.

2. Compact Growth Habit

  • Alocasia Micholitziana typically grows to about 2-3 feet tall, making it a perfect choice for indoor spaces.
  • Its upright growth habit and manageable size fit well on shelves, plant stands, or as a centerpiece.

3. Tropical Origins

Native to Southeast Asia, this plant thrives in warm, humid environments and brings the lush beauty of the tropics into your home.

Why Choose Alocasia Micholitziana?

1. Unique Aesthetic Appeal

The velvety texture and striking vein pattern of its leaves make this plant a true statement piece.

2. Compact and Elegant

Its size and upright growth habit make it a versatile choice for small spaces or to complement larger plants in a collection.

3. Rewarding to Grow

Though it requires specific care, the Alocasia Micholitziana is highly rewarding, providing a sense of accomplishment as it flourishes.

Comprehensive Care Guide

1. Light Requirements

  • Optimal: Bright, indirect sunlight is ideal for maintaining the deep green color and strong growth.
  • Avoid: Direct sunlight, which can scorch the leaves, and low-light conditions, which may cause leggy growth and dull foliage.
  • Tip: If natural light is limited, use a grow light to supplement, ensuring the plant receives enough brightness to thrive.

2. Watering Needs

  • Water the plant when the top 1-2 inches of soil feel dry to the touch.
  • Keep the soil consistently moist but avoid waterlogging, as this can lead to root rot.
  • Reduce watering during the plant’s dormancy period in winter.
  • Tip: Use filtered or rainwater to avoid mineral buildup, which can harm the roots and foliage.

3. Humidity Levels

  • Alocasia Micholitziana thrives in high humidity, ideally above 60%.
  • How to Maintain Humidity:
    • Use a humidifier near the plant.
    • Place the pot on a pebble tray filled with water.
    • Mist the leaves regularly, especially during dry seasons or in air-conditioned environments.

4. Temperature Preferences

  • Prefers warm temperatures between 18–30°C (65–85°F).
  • Protect the plant from drafts, cold air, or sudden temperature changes.

5. Soil and Potting

  • Use a well-draining potting mix rich in organic matter. A mix of peat moss, perlite, and orchid bark works well.
  • Ensure the pot has adequate drainage holes to prevent water retention at the roots.

6. Fertilization

  • Feed the plant every 4-6 weeks during the growing season (spring and summer) with a diluted, balanced liquid fertilizer.
  • Skip fertilization during winter dormancy to prevent overfeeding.

7. Pruning and Maintenance

  • Remove yellowing, browning, or damaged leaves to keep the plant looking fresh and healthy.
  • Gently clean the leaves with a damp cloth to remove dust and maintain their velvety texture.

8. Repotting Needs

  • Repot every 1-2 years or when the plant becomes root-bound. Use a pot that is 1-2 inches larger in diameter than the current one to accommodate growth.

Common Issues and Solutions

1. Yellowing Leaves

  • Cause: Overwatering or poor drainage.
  • Solution: Allow the soil to dry slightly between waterings and ensure proper drainage.

2. Browning Leaf Edges

  • Cause: Low humidity or inconsistent watering.
  • Solution: Increase humidity levels and maintain a regular watering schedule.

3. Drooping Leaves

  • Cause: Environmental stress, such as sudden changes in light or temperature.
  • Solution: Move the plant to a stable environment with consistent care.

4. Pest Infestations

  • Common Pests: Spider mites, aphids, and mealybugs.
  • Solution: Treat with neem oil or insecticidal soap and inspect the plant regularly to catch pests early.

Decorating with Alocasia Micholitziana

1. Elegant Centerpiece

  • Use the plant as a focal point on a table or shelf to showcase its unique foliage.

2. Complementing Tropical Plants

  • Pair it with other tropical plants like philodendrons or monsteras to create a lush indoor garden.

3. Modern and Minimalist Style

  • Place it in a neutral or decorative pot to enhance its striking appearance, fitting well in contemporary or minimalist interiors.

How It Compares to Other Alocasias

Feature Alocasia Micholitziana Other Alocasias
Foliage Texture Velvety with bright veins Glossy or smooth
Size Compact (2-3 feet tall) Varies: small to very large
Care Level Moderate Moderate to challenging
Light Requirements Bright, indirect light Similar for most Alocasias

Tips for Success with Alocasia Micholitziana

  1. Consistent Environment: Keep the plant in a stable location with steady light, humidity, and temperature.
  2. Proper Watering: Strike a balance between moist and well-drained soil to avoid root rot.
  3. High Humidity: Use a humidifier or pebble tray to mimic its natural environment.
  4. Regular Monitoring: Check for pests and signs of stress regularly to catch and address issues early.

Conclusion

Alocasia Micholitziana is a captivating plant that adds elegance and tropical charm to any indoor space. While it requires specific care, its stunning velvety foliage and manageable size make it a rewarding addition to your plant collection. By following the care tips in this guide, you can ensure your Green Velvet Alocasia thrives and continues to bring beauty to your home.

Add Alocasia Micholitziana to your indoor garden today and enjoy the satisfaction of nurturing this exotic and graceful plant!

Alocasia Pink Dragon Price: What You Need to Know Before Buying


The Alocasia Pink Dragon is a stunning and unique tropical plant that has captivated plant enthusiasts with its vibrant pink stems and glossy green leaves. This eye-catching plant is a must-have for collectors and indoor gardeners alike, but its popularity and exotic appeal often influence its price. Before adding this beauty to your collection, it’s essential to understand its typical pricing, factors that affect cost, and where to find it.

Overview of Alocasia Pink Dragon

1. Distinctive Features

  • Pink Stems: The vibrant pink hue of the stems gives this Alocasia its name and sets it apart from other varieties.
  • Glossy Foliage: Its large, deep green leaves with metallic undertones create a striking contrast against the pink stems.
  • Compact Size: Perfect for indoor spaces, the Pink Dragon typically grows up to 2-3 feet tall, making it suitable for desks, shelves, or plant stands.

2. Popularity

  • The Alocasia Pink Dragon has become a favorite among plant collectors due to its unique aesthetic and manageable size.
  • It is a relatively rare variety, which contributes to its high demand and value.

Price Range of Alocasia Pink Dragon

The cost of an Alocasia Pink Dragon can vary significantly depending on its size, maturity, seller, and location. Below is an approximate price guide:

Plant Size Price Range
Small (Seedling/Young Plant) $20–$40
Medium (1–2 feet tall) $40–$80
Large (2+ feet tall) $80–$150+
Rare or Highly Variegated Specimens $150–$300+

Factors Influencing Price

1. Plant Size and Maturity

  • Seedlings and Young Plants: Smaller plants are more affordable but require time and care to reach their full potential.
  • Mature Plants: Larger, well-established Pink Dragons are pricier due to their size and readiness to display full foliage.

2. Rarity and Demand

  • As a unique and visually striking variety, the Pink Dragon is often in high demand but has limited availability, especially in some regions.

3. Seller Type

  • Local Nurseries: Offer competitive prices and allow you to inspect the plant before purchase.
  • Specialty Stores: Focus on rare plants and may charge a premium for quality and rarity.
  • Online Marketplaces: Prices vary widely, but shipping costs and risks must be considered.

4. Geographic Location

  • In tropical or temperate regions where Alocasias are more common, prices may be lower.
  • In colder climates or areas with limited supply, the cost may increase due to importation or shipping expenses.

Where to Buy Alocasia Pink Dragon

1. Local Nurseries

  • Pros: You can personally inspect the plant for health and size before buying.
  • Cons: Availability may be limited, especially in non-tropical regions.

2. Online Plant Retailers

  • Widely available from specialty plant stores and marketplaces like Etsy, Amazon, and independent plant shops.
  • Ensure the seller has good reviews and proper shipping practices to avoid damage during transit.

3. Plant Shows and Markets

  • Plant expos and markets are excellent places to find rare varieties like the Pink Dragon. Prices may also be more competitive compared to specialty shops.

4. Social Media and Plant Groups

  • Join plant-buying groups or follow local growers on platforms like Facebook and Instagram. You can often find great deals or even trade with other collectors.

5. Specialty Plant Shops

  • Dedicated rare plant stores often carry Alocasia Pink Dragon and ensure top-quality specimens, though they may charge higher prices.

Tips for Buying Alocasia Pink Dragon

1. Inspect the Plant

  • Foliage: Look for vibrant green leaves with no yellowing, spots, or signs of damage.
  • Stems: Ensure the pink stems are firm and healthy without discoloration.
  • Roots: If possible, check that the roots are white and free of rot.

2. Choose the Right Size

  • Beginners may prefer starting with a small or medium-sized plant to gain experience in Alocasia care.
  • Experienced collectors might opt for a mature specimen to enjoy its full display immediately.

3. Beware of Pests

  • Inspect for common pests like spider mites or mealybugs, especially if buying from an online seller.

4. Understand Shipping Risks

  • When buying online, ensure the seller provides proper packaging and heat packs during colder months to protect the plant during transit.

Caring for Your Alocasia Pink Dragon

Once you’ve brought home your Pink Dragon, proper care is essential to maintain its stunning appearance and health.

Light Requirements

  • Optimal: Bright, indirect sunlight.
  • Avoid: Direct sunlight, which can scorch the leaves, and low light, which may hinder growth.

Watering Needs

  • Keep the soil consistently moist but not soggy. Water when the top 1-2 inches of soil feel dry.
  • Reduce watering in the winter when the plant’s growth slows.

Humidity

  • High humidity (above 50-60%) is ideal.
  • Use a humidifier, mist the plant, or place it on a pebble tray with water to maintain proper moisture levels.

Temperature

  • Prefers warm conditions between 18–30°C (65–85°F). Protect it from cold drafts or sudden temperature changes.

Soil and Fertilization

  • Use a well-draining potting mix rich in organic matter. A mix of peat moss, perlite, and loam works well.
  • Fertilize monthly during spring and summer with a diluted, balanced liquid fertilizer.

Decorating with Alocasia Pink Dragon

1. Statement Piece

  • The Pink Dragon’s bold stems and glossy leaves make it an excellent centerpiece for a table, shelf, or plant stand.

2. Tropical Vibe

  • Pair it with other Alocasias or tropical plants like philodendrons and monsteras to create a lush indoor jungle.

3. Modern Elegance

  • Its vibrant pink stems add a pop of color to minimalist or contemporary interiors.

Conclusion

The Alocasia Pink Dragon is a stunning addition to any plant collection, offering vibrant pink stems and glossy foliage that bring a touch of tropical elegance to your home. Understanding the price range and factors influencing cost can help you make an informed purchase. Whether you’re buying from a local nursery, an online retailer, or a specialty shop, ensure you choose a healthy specimen and provide the right care to keep your Pink Dragon thriving.

Bring home the Alocasia Pink Dragon today and enjoy the beauty and sophistication it adds to your indoor garden!

Understanding Variegated Alocasia Nobilis: A Collector’s Dream


The Variegated Alocasia Nobilis is a captivating and rare gem in the world of exotic houseplants. Known for its striking variegation and slender, elongated foliage, this tropical beauty is a prized possession for plant collectors and enthusiasts. Its rarity, unique appearance, and specific care requirements make it a dream plant for those looking to expand their collection with something truly special. This guide explores the stunning features, care needs, and tips for maintaining the Variegated Alocasia Nobilis in your indoor garden.

What Makes Variegated Alocasia Nobilis Special?

1. Elegant Variegated Leaves

The defining characteristic of the Variegated Alocasia Nobilis is its long, narrow leaves adorned with patches of creamy white or yellow variegation. Each leaf is a unique work of art, with the variegation pattern varying from plant to plant. The combination of dark green and variegated sections creates a visually stunning contrast that elevates any plant collection.

2. Sleek and Graceful Form

  • Unlike the broader leaves of other Alocasias, Nobilis boasts slender, lance-shaped foliage that adds a touch of elegance and minimalism.
  • Its upright growth habit enhances its sculptural appeal, making it a perfect statement plant for modern interiors.

3. Rare and Coveted

Variegated Alocasia Nobilis is not only visually stunning but also hard to come by. Its rarity increases its desirability among plant collectors, making it a true centerpiece for those lucky enough to own one.

4. Tropical Origins

Native to the rainforests of Southeast Asia, this plant thrives in warm, humid environments. It brings the exotic charm of the tropics to your home, transforming any space into a lush sanctuary.

Why Add Variegated Alocasia Nobilis to Your Collection?

1. Aesthetic Appeal

The variegated foliage is a showstopper, offering a unique look that sets it apart from other houseplants. Its elegant form and rare variegation make it a standout choice for collectors and decorators alike.

2. A Challenge Worth Taking

While this plant requires careful attention to its environment and care, the effort is part of its allure. Watching it thrive under your care is immensely rewarding.

3. Value and Prestige

As one of the rarer Alocasia varieties, owning a Variegated Nobilis is a mark of distinction among plant enthusiasts. Its value extends beyond its beauty, as it symbolizes dedication and expertise in plant care.

Comprehensive Care Guide

1. Light Requirements

  • Optimal: Bright, indirect sunlight is crucial for maintaining the plant’s variegation and healthy growth. A spot near an east- or west-facing window is ideal.
  • Avoid: Direct sunlight, which can scorch the leaves, and low light, which may cause the variegation to fade.
  • Tip: Supplement with a grow light if natural light is insufficient, especially during winter months.

2. Watering Needs

  • Water the plant when the top 1-2 inches of soil feel dry to the touch.
  • Keep the soil consistently moist but not waterlogged. Overwatering can lead to root rot, while underwatering may cause the leaves to wilt.
  • Use distilled or rainwater to prevent mineral buildup, which can be harmful to the plant.

3. Humidity Levels

  • The Variegated Alocasia Nobilis thrives in high humidity, ideally above 60%.
  • How to Increase Humidity:
    • Place the plant near a humidifier.
    • Use a pebble tray filled with water under the pot.
    • Mist the leaves regularly, particularly in dry climates or during winter.

4. Temperature Preferences

  • Prefers warm conditions between 18–30°C (65–85°F).
  • Keep it away from cold drafts, air conditioning vents, or sudden temperature changes.

5. Soil and Potting

  • Use a well-draining potting mix enriched with organic matter. A mix of peat moss, perlite, and orchid bark works well.
  • Ensure the pot has adequate drainage holes to prevent water accumulation.

6. Fertilization

  • Fertilize every 4-6 weeks during the growing season (spring and summer) with a diluted, balanced liquid fertilizer.
  • Reduce or stop fertilizing during the winter when the plant’s growth slows.

7. Pruning and Maintenance

  • Remove any yellowing or damaged leaves to encourage healthy growth.
  • Clean the leaves gently with a damp cloth to keep them dust-free and enhance their glossy appearance.

8. Repotting Needs

  • Repot the plant every 2-3 years or when it becomes root-bound. Choose a pot slightly larger than the current one to accommodate growth.

Common Issues and Solutions

1. Leaf Yellowing

  • Cause: Overwatering or poor drainage.
  • Solution: Allow the soil to dry out slightly between waterings and ensure proper drainage.

2. Browning Edges

  • Cause: Low humidity or inconsistent watering.
  • Solution: Increase humidity and maintain a regular watering schedule.

3. Fading Variegation

  • Cause: Insufficient light.
  • Solution: Move the plant to a brighter spot with indirect light or supplement with a grow light.

4. Pest Infestations

  • Common Pests: Spider mites, mealybugs, and aphids.
  • Solution: Treat with neem oil or insecticidal soap. Inspect the plant regularly to catch infestations early.

Decorating with Variegated Alocasia Nobilis

1. Modern Elegance

  • Use the plant as a centerpiece in minimalist or contemporary interiors. Its sleek form and bold variegation make it a natural focal point.

2. Tropical Vibe

  • Pair it with other tropical plants, such as calatheas or philodendrons, to create a lush, jungle-inspired corner in your home.

3. Highlighting Its Beauty

  • Place the plant in a simple, neutral pot to let its foliage shine, or choose a decorative pot to complement its exotic appearance.

How It Compares to Other Alocasias

Feature Variegated Nobilis Other Alocasias
Foliage Shape Narrow, elongated Varies: heart-shaped, broad, textured
Foliage Color Green with creamy white variegation Solid green, variegated, or dark hues
Size Compact to medium (2-4 feet) Varies: small to very large
Care Difficulty Moderate to challenging Moderate to challenging
Decor Appeal Sleek and elegant Bold and tropical

Tips for Success with Variegated Alocasia Nobilis

  1. Consistent Light: Ensure bright, indirect sunlight to preserve its stunning variegation.
  2. Proper Watering: Strike a balance between moist and well-drained soil to avoid common issues like root rot.
  3. High Humidity: Use a humidifier or pebble tray to mimic its natural environment.
  4. Regular Monitoring: Check for pests and signs of stress, such as browning or yellowing leaves, and address issues promptly.

Conclusion

The Variegated Alocasia Nobilis is a true collector’s dream, offering unparalleled elegance and a touch of the exotic to any indoor garden. Its rare variegation and graceful form make it a standout choice for plant enthusiasts looking to elevate their collection. While it requires attentive care, the rewards of nurturing this rare beauty are well worth the effort.

Bring the Variegated Alocasia Nobilis into your home and enjoy the tropical sophistication it brings to your space!

Exit mobile version