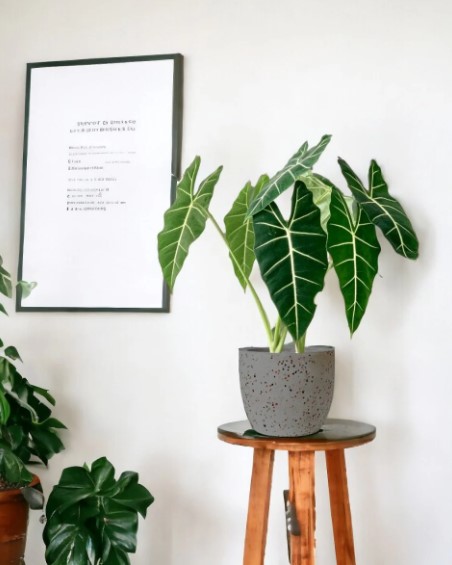
Rhizome rot is a common but preventable issue for Alocasia plants, often resulting from overwatering, poor drainage, or soil-borne pathogens. If left untreated, this problem can cause extensive damage to your plant, including leaf yellowing, stunted growth, and even death. However, with the right care practices and early intervention, you can protect your Alocasia and keep it thriving. This guide provides essential strategies to prevent rhizome rot and maintain the health of your plant.
What is Rhizome Rot?
Rhizome rot occurs when the underground structure of the Alocasia, known as the rhizome, begins to decay. This condition is often caused by:
- Excess Moisture: Overwatering or waterlogged soil deprives the rhizome of oxygen, causing it to break down.
- Pathogens: Fungal and bacterial infections thrive in wet, compacted soil and attack the rhizome.
- Poor Drainage: Improper soil and pots without drainage holes trap excess water.
Symptoms of Rhizome Rot
Above-Ground Indicators:
- Yellowing Leaves: A common sign of water stress.
- Drooping Foliage: Despite watering, leaves appear limp or lifeless.
- Stunted Growth: The plant produces fewer or no new leaves.
- Leaf Drop: Healthy-looking leaves may suddenly fall off.
Below-Ground Indicators:
- Mushy Rhizome: A healthy rhizome is firm and tan, while a rotting one is soft, dark, and may emit a foul smell.
- Darkened Roots: Roots appear black or brown instead of white or light tan.
Causes of Rhizome Rot
- Overwatering: Frequent watering keeps the soil too wet, preventing oxygen from reaching the rhizome.
- Improper Soil Mix: Dense, poorly draining soils trap water and promote rot.
- Inadequate Pot Drainage: Pots without drainage holes retain excess water at the bottom.
- Humidity Fluctuations: Excessively humid soil conditions combined with low air circulation encourage fungal growth.
- Pathogen Infections: Fungi like Pythium and bacteria thrive in damp, compacted soil, attacking weakened rhizomes.
Prevention Strategies for Rhizome Rot
1. Use a Well-Draining Soil Mix
- Ideal Mix: Combine peat moss, perlite, and orchid bark for a blend that retains moisture while allowing excess water to drain.
- Avoid Heavy Soils: Do not use garden soil or heavy potting mixes that retain water for too long.
2. Choose the Right Pot
- Always select pots with drainage holes to allow water to escape.
- Use terracotta pots to absorb extra moisture and promote better aeration.
3. Water Wisely
- Water only when the top 1-2 inches of soil are dry.
- Use a moisture meter to check soil moisture levels at the root zone.
- Adjust watering frequency based on the season: less water is needed during winter dormancy.
4. Maintain Ideal Humidity
- Keep air humidity levels above 50%, but avoid letting the soil remain wet.
- Use a pebble tray or humidifier to increase air moisture without overwatering.
5. Monitor Drainage
- Check how quickly water drains after watering. If water pools at the surface, it’s time to repot with a better soil mix.
6. Inspect Regularly
- Periodically lift the pot to check for roots emerging from the drainage holes.
- Early signs of stress, like yellowing or drooping leaves, can indicate underlying rhizome issues.
How to Treat Rhizome Rot
1. Stop Watering Immediately
- Let the soil dry out to prevent further damage while you inspect the plant.
2. Remove the Plant from the Pot
- Carefully take the Alocasia out of its pot to examine the roots and rhizome.
3. Trim Affected Areas
- Use sterilized scissors or pruning shears to remove any mushy, discolored, or foul-smelling sections.
- Cut back to healthy, firm tissue.
4. Disinfect the Rhizome
- Soak the remaining healthy rhizome in a hydrogen peroxide solution (1 part hydrogen peroxide to 4 parts water) for 10 minutes.
- This step helps kill pathogens and oxygenates the rhizome.
5. Repot in Fresh Soil
- Use a clean pot with fresh, well-draining soil to avoid reinfection.
- Avoid watering immediately after repotting to let the rhizome recover.
6. Adjust Care
- Place the plant in a location with bright, indirect light.
- Resume watering only when the soil feels dry to the touch.
Best Practices for Long-Term Alocasia Health
- Set a Watering Schedule: Water consistently, but ensure the topsoil dries between sessions.
- Use the Right Soil Mix: Always pot Alocasia in a mix designed for aroids or tropical plants.
- Inspect During Repotting: Examine the rhizome and roots for any signs of decay every 1-2 years when repotting.
- Maintain Stable Conditions: Avoid abrupt changes in temperature, humidity, or light, which can stress the plant.
- Check for Pests: Some pests, like root-feeding nematodes, can weaken the rhizome and make it more susceptible to rot.
Common Questions About Rhizome Rot
Q: How often should I water my Alocasia?
- Water when the top 1-2 inches of soil are dry. The frequency depends on the season, pot size, and humidity levels.
Q: Can I save an Alocasia with rhizome rot?
- Yes, if caught early. Remove the rotted sections, disinfect the rhizome, and repot in fresh soil.
Q: Should I fertilize after treating rhizome rot?
- Wait at least 4-6 weeks to allow the plant to recover before applying a diluted fertilizer.
Q: What type of soil is best for Alocasia?
- A well-draining mix with peat moss, perlite, and orchid bark works best. Avoid compact or water-retaining soils.
Conclusion
Rhizome rot can be a challenging issue for Alocasia owners, but with proper care and preventive measures, it’s entirely avoidable. By using a well-draining soil mix, watering wisely, and maintaining optimal humidity, you can create an environment where your Alocasia thrives. Regular monitoring and early intervention are key to addressing potential problems before they escalate.
With the tips in this guide, you’ll be well-equipped to protect your Alocasia from rhizome rot and enjoy its stunning foliage for years to come!
